How customer groups work
Customer groups belong in a ‘set’. You can have multiple sets, and multiple groups within each set. This means you have flexibility to organise your customers in different ways for different purposes.
Set
A set has multiple groups within it. You might create a set to organise your customers by their region, delivery run, priority, or the types of products you offer them.
Groups
Groups belong in a set. Customers can be assigned to only one group per set. Note, customers will not be able to see the customer group(s) they are assigned to.
Set up customer groups
Add a new set
- Open Customer groups, under the Settings link in the sidebar.
- Click the Add new set button at the top right of the page.
- Give the set a name, such as ‘Region’ or ‘Delivery run’. You can label some of the groups within this set in this window (and add more if you need by clicking ‘Add another group’). You can add or edit these groups later.
- Click Done.
Assign customers to a group
- Open the group by clicking its name in the left column.
- Click Edit at the top right of the page.
- Click Add another customer and add each customer by using the ‘Add’ button. Click ‘Done’ to close this window.
- Click Save.
Add groups to existing set
- Click the ‘+’ icon next to the set name in the left column.
- Type in the new group’s name on the right side of the page.
- Add customers by clicking the Add another customer button, or leave it blank for now.
- Click Save.
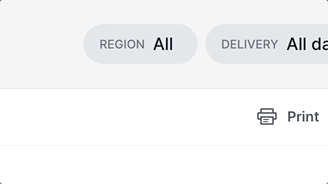
Filter orders by customer group
- On the Orders page, you will see a filter button show for each set you’ve added. (Note, only groups which have customers assigned to it will appear.)
- Click on the filter button and choose a group. Now, only orders placed by customers assigned to this group will show.
- To remove the filter (and show all of the orders again), click the ‘x’ on the filter button.